|

|
|

|
Developing with MapPoint and Visual Studio Part 2: The ActiveX componentIn this follow-up to his article last year on Developing with Visual Studio 2010 and MapPoint, Wilfried Mestdagh now shows how to get started with the ActiveX Control
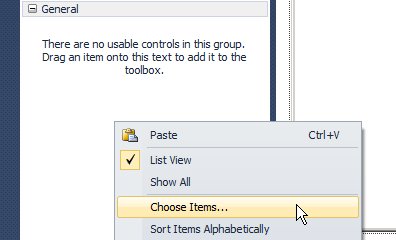
Sometimes people think MapPoint's architecture is so archaic is doesn't work with modern development tools. Well, nothing is less true. Every modern development tool is perfecly suited to use. This article is a small tutorial on how to start with MapPoint in VS2010, using the provided ActiveX control. OK, let's do it. I assume you have installed Visual Studio 2010 and MapPoint 2010 (or any other version). We start the development tool and create a new windows forms application. First thing to do is to add the MapPoint control to the toolbox. To do this right click in the toolbox and click on 'Choose Items' as shown below.
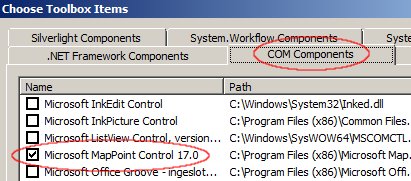
Next click the tab 'COM Components' and check 'Microsoft MapPoint Control 17' as shown below, then click 'OK'.
Congratulations, the MapPoint control is now add to your toolbox as shown below. Click it and drop it on your form.
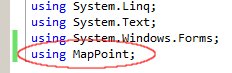
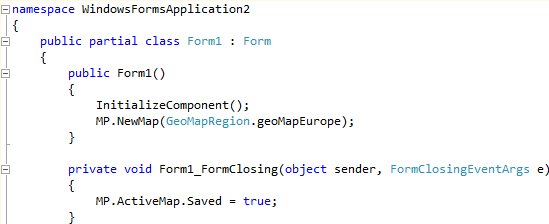
Next thing to do is what you (hopefully) always do after dropping a component to a form and that is: give it a non-confusing exclusive name. For example 'MP'. Now we are going to add a little code. First of all you have to include the mappoint class in your code. Then in the constructor of the form we open a new map, and we assign a FormClosing event where we set the 'Saved' property true because we don't want a popup window saying: 'Save the map?' every time we close our application. Both is shown below.
Et voila we are done. If you compile and run your appliction you have MapPoint sitting on your form and you can code whatever you wish to do with it. Happy coding :)
 Author: Wilfried Mestdagh Author: Wilfried MestdaghEmail: wilfried(AT)mestdagh.biz Wilfried Mestdagh works as software engineer at the company Sonal in Mortsel, Belgium. His main work is writing software for fleet management and onboard computers. Fleet management is mainly written in Delphi and C# while the onboard computers are mostly programmed in C. His department started years ago for specializing in tracking and tracing security and dangerous transport vehicles, but it is grown to satisfy a very wide of vehicle / truck fleet customers.
|
|
||||||||||||||||||||||||||||||||||||||||||||||||||||||||||||||||||
|
|
||||||||||||||||||||||||||||||||||||||||||||||||||||||||||||||||||||